BLOG

Home Decor, Home Design Laura Key Home Decor, Home Design Laura Key

2022 Design Trends

Did you know that each year paint and pigment companies work hard to predict the hottest trends in colors. They choose the “Color of the Year” and home designers love to infuse new tones and hues into their new designs.

Did you know that each year paint and pigment companies work hard to predict the hottest trends in colors. They choose the “Color of the Year” and home designers love to infuse new tones and hues into their new designs.

For 2022, Shades of Green will be all the rage. While there is no consensus about the specific shade of green and the colors range from soft neutral mists to deep evergreen, suddenly style magazines are boasting green in everything from furniture to fixtures.

Home designers have wasted no time incorporating these new colors in their styles. Accent chairs in bright bold Seafoam will instantly add a modern touch to your living spaces. Backsplashes in olives and cypress create a new ambiance for the kitchen. A soothing color, green can also create a relaxing environment in a bedroom or bathroom. Make easy changes like new linens or towels for a quick uplift.

Paint is also a great way to instantly brighten a room. Take advantage of the new green colors like guacamole or olive sprig to transform a neutral-toned room to an interesting, modern space. Doors, kitchen accents, walls, and furniture are great weekend projects to add green to your home.

The shade of the year is Green! Soft, bright, blue-tones, yellow-toned, and everything in between. If you’re ready to make a change, add a pop of color in any room and embrace the Shade of the Year.

Photo by Spacejoy on Unsplash

Read More
Home Decor Laura Key Home Decor Laura Key

Japandi – The Hottest Global Design Trend

usion restaurants have been blending various culinary tastes for years with exciting new dishes and flavors. Japandi may sound like the latest dining fad but it’s the home design trend that’s taking the world by storm. A careful merging of Scandinavian elements with Japanese lines, Japandi is making a strong appearance in home magazines and shows.

Japandi – The Hottest Global Design Trend

Fusion restaurants have been blending various culinary tastes for years with exciting new dishes and flavors. Japandi may sound like the latest dining fad but it’s the home design trend that’s taking the world by storm. A careful merging of Scandinavian elements with Japanese lines, Japandi is making a strong appearance in home magazines and shows.

Hygge and Wabi-Sabi
No, these aren’t condiments for your California roll. Hygge is a Danish word meaning coziness and emphasizes the use of natural materials in furniture and fabrics to add softness in line and feel. Wabi-Sabi is the Japanese design style that centers around the idea that something doesn’t need to be perfect to be beautiful. Imperfect shapes, lines, finishes can add a sense of well-being when used in room décor.

Simple and Neutral
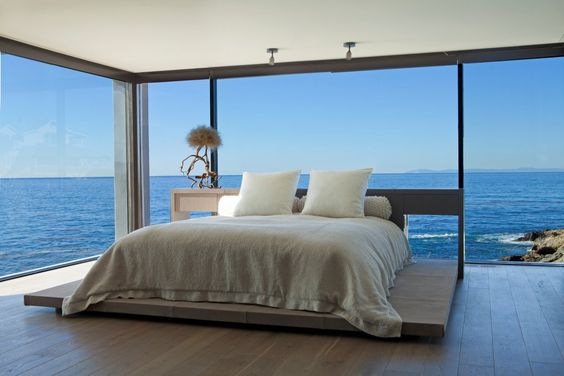
Central to the design of Japandi are spaces that embrace minimalism. Contrary to more traditional styling, a room does not need to be over-furnished to be cozy. Far from being austere, Japandi utilizes comfortable, utilitarian furniture that tends to be lower to the floor. Soft neutral tones blend from floor to ceiling and bright open floor plans allow the eye to move effortlessly from one space to another. Japandi removes the eclectic patterns and boldness of recent years and replaces them with calm and inviting rooms in which to relax and unwind.

Sign up for your FREE Homebuyer Course Today! Learn on YOUR time in the comfort of YOUR home!

bit.ly/housekey

Read More

IDEAS FOR ACCENT WALLS

An accent wall can totally transform a room, taking it from boring and drab to bold and exciting. Accent walls create a new focal point for your space, add liveliness and contrast, and are typically a very inexpensive DIY project.

The starter accent wall

You can easily add an accent wall to your room in one afternoon by applying a new paint color. Deep blues and bright oranges are common choices for accent walls, but choose a color that will complement your existing decor and overall design aesthetic.

Interesting textures

Bright, contrasting paint is a good starting point, but there are other options for accent walls that are even more eye-catching and distinct. Floor-to-ceiling wood planks can make your home seem both rustic and modern all at once and provide a natural, outdoors-inspired feel. It’s more work than simply painting a wall, but it’s still relatively inexpensive. You can source the wood from pallets on Craigslist and stain it yourself before attaching it to your wall. It takes a little extra elbow grease, but it’s worth the effort.

Patterns, murals, and more

Paint and wood are bold enough on their own to transform a room, but they’re still pretty subtle compared to other accent wall options. A chalk paint accent wall is a creative idea for any room and makes for some fun moments when you’re entertaining. There are also endless options for wallpaper and stenciling if you want some patterns or you can get really bold with a mural or oversized art print.

Visit my Instagram Page for more tips! https://www.instagram.com/realtygoddess/

Read More

Painting Your Own Home: Tips to Make the Process Painless

Young family painting the wall

Painting Your Own Home: Tips to Make the Process Painless

While it’s might seem easier to hire professionals to paint the house, but with a little research you can find the job is not as intimidating as it seems. With a few free days set aside and some preparation, painting one room (or multiple) is easily doable for anyone. Here are a few things to consider before you start.

Apply a Primer Coat

Preparation entails most of the painting process. It’s easy to become frustrated during the preparation stage, because prepping to paint can take longer than the actual painting component of the project.

Interior walls aren’t always perfect, and painting the walls is a perfect opportunity to fix those imperfections. If you’re using a putty or a filler to patch holes, the paint will react differently to those substances than it will the wall itself. The solution here is to prime your walls, so the new paint color has a uniform surface to adhere to. It’s one simple step that doesn’t seem like much, but could end up saving you a whole lot of work at the end of the process.

Factor in taping time

Taping up the room is tedious work, but will be worth it when you don’t have to waste time being ultra-careful or nervous when getting close to edges. Instead of trying to take the tape off while the paint is still dry, wait at least 24 hours for the paint to dry, and use a knife to slice the tape off at the edge. If the paint is still even a little wet or gummy, don’t continue. Make sure the knife is sharp enough and pull the tape away at a 45-degree angle, making sure not to rip the paint.

Set up with clean-up in mind

To protect floors, a drop cloth is a necessity. In some cases, cotton or canvas drop clothes can work better than plastic. Plastic drop cloths can be slippery and don’t easily stay in place, especially when ladders are involved. Any splatters or drips of paint that fall onto a plastic drop cloth won’t dry or absorb right away and can be easily tracked throughout the rest of your house. A canvas or cotton drop cloth will be more stable and will protect the floors better. Tape the edges of the drop cloth to the tops of the trim to protect both the floor and the trims from any splattering or dripping paint.

Work top down

Not only does it prevent drips from ruining anything you’ve already painted, but it keeps the walls and baseboards free of any dust or debris from sticking to wet trim. Paint the ceiling first, move to the walls and possible crown moldings. Only then should you move to any trims around windows or doors and finish with the baseboards. Not only will this keep a system in place to ensure there’s no questioning what’s been painted and what hasn’t, but it’ll keep things clean.

Check thickness of previous paint layers

Cracks on an exterior paint job don’t reflect the owner’s best intentions and should be fixed before the damage is too much to fix. Too thick of a layer of paint means that the paint might just be too heavy to stay, and will start to crack and to peel off. It loses its grip and can’t attach to the other layers of paint. In older homes, it’s likely that some of those layers of paint have lead in them, in which case you’ll need to look into how to remove it safely. The EPA has guidelines here. This could be the one step that requires you to outsource, if the layer of paint is extremely thick, because removing it completely (and correctly) will ensure the next coat of paint will attach correctly. Hiring a home washing company can help you identify these cracks in exterior paint as well. If anything, have the exterior of your home professionally power washed, so the paint will have a clean surface to adhere to.

Using these tips, ideally the house-painting process will be doable for anyone. Prepare yourself to set aside time for set-up, knowing that it will help when you’re done painting and ready to clean up. Instead of hiring painting professionals, save some money for decorating and tackle the job yourself.

Curious to know how much your Southern California home is worth! Get an instant report now! www.CaliOnTheMove.com 

Bio: Matt Lawler is an Internet marketing specialist from Tempe, Arizona where he attended Arizona State University. Whenever he can step away from the computer, Matt enjoys playing sports, traveling and exploring the great outdoors. Follow him on Twitter.

Laura Key, REALTOR® Cal BRE 01908085 310-866-8422 Laura.A.Key@gmail.com www.KeyCaliforniaHomes.com

Read More

Happier Hardwood Floors

Hardwood Floors

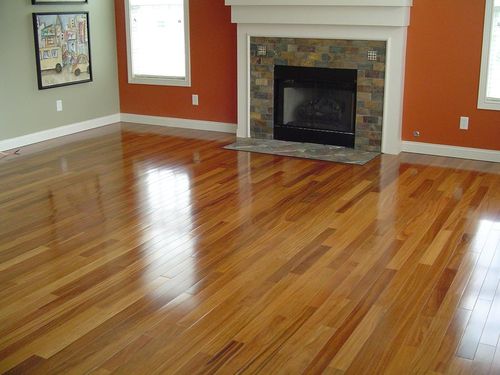
Hardwood floors make for a beautiful, stunning addition to your home. However, they can bring new cleaning and maintenance challenges that aren’t present with carpet. Here are some tips for simple, efficient, and thorough hardwood floor cleaning.

Make the job easier Place mats on either side of your exterior doors and always remove your shoes before entering your home—and make sure your guests do the same. Protect the floors by placing felt (or similar) protectors on the feet of your furniture, and use area rugs to designate play areas for the kids. This will reduce extra dirt, dust, and floor scratches.

Weekly cleaning Sweeping with a standard broom will remove some dirt and dust, but not as much as a mop, wipe, or broom that’s been treated with a dusting agent such as a Swiffer. You could also invest in a vacuum that is designed for hardwood floors. Just be sure that the vacuum won’t leave scratches!

Deeper cleaning Regular sweeping will remove most dirt and dust, but occasionally you’ll need to give the floors a deeper cleaning to remove the dirt and grime that builds up in your floors’ seams. Use a wood-cleaning soap to thoroughly mop your floors, but make sure the mop isn’t sopping wet—you don’t want to leave standing water.

Spots and scuffs Most of the marks that occasionally show up on your floors, such as scuffs from rubber soles on boots and shoes—can be wiped away with a rag or very fine steel wool.

To find your next home: www.KeyCaliforniaHomes.com To find the value of your current home: www.CaliOnTheMove.com

The "KEY" to your real estate dreams!

Lots of Los Angeles Real Estate Agents want to be stars as big as the celebrities they cater to. Me? I just want to help people find the homes that make them happy and help them to create a sanctuary for future dreams and lasting memories.

Laura Key 310-866-8422 Laura.A.Key@gmail.com Cal BRE #01908085

Read More

The Balance Between Packing and Staging When Trying to Sell a Home

Staging your home is basically decorating it for showings. The idea is to make your house look like a house other people would like to live in, and make the house appeal to as many people as possible. While this seems easy enough for most people, it does make packing your home up for a big move complicated. Of course, a full-service moving company such as these full service movers could come and pack everything for you after your house sells, but if hiring a mover isn’t in the budget then there is a complicated issue.

The balance seems impossible. If you pack up your stuff there will be boxes everywhere and your house will look like a mess while it’s for sale. If you leave it as is until the day before you move you will be rushed, stressed, and less careful. So how do you find the sweet spot? Hopefully the following tips will provide you with some valuable insight.

De-clutter Your Space

De-cluttering will be the most helpful thing in achieving this balance without a doubt. Not only will less junk make your house appear larger and more open, but less messy without unused furniture. Gather up everything that wont have a place in your new home and donate what you can, otherwise call these furniture removal specialists.

Repaint the Interior

This is something you will likely have to do for the next owners anyway. Putting a fresh layer of paint over every room will make the room seem much cleaner and brighter. You will want to stick to neutral colors to really chase mass appeal. This is a great home staging idea that can be done easily (and quickly with the help of these one day painters).

Use Packing to Help Stage

Pack each room individually and put away anything not necessary for staging. Pack up all your family pictures, souvenirs and mementos and place them in the closet. Basically half-packing each room will actually make your home feel more organized and clean while also removing remnants of the past owner. Taking your personal style out of the house will make sure that more people can visualize themselves making it their own home. Once the extra things are packed (or thrown) away you should have more space available inside the house. Take advantage of this to show a room’s full potential rather then just leaving all your furniture where it is.

Continue Minimizing 

There are still ways to continue minimizing. Take all of your child’s wall decorations down and pack them up. I recommend putting all of the extra boxes neatly in the garage to maximize space inside the house. Continue purging the house for items that show the previous owner, as these must be packed prior to showing the house. Extra mirrors, wall decorations and small appliances are also great things to pack away ahead of time. People viewing your house may open up some cabinets in the kitchen so if they are partially packed they will look extra spacious.

Written by Matt Lawler www.zogdigital.com

Laura Key, Realty Goddess

310-866-8422

www.KeyCaliforniaHomes.com

HOW MUCH IS YOUR HOME WORTH?

www.CaliOnTheMove.com

Laura.A.Key@gmail.com


Read More

15-Minute Home Makeovers

Home_Makeover

15-Minute Home Makeovers

By: Lisa Kaplan Gordon

Published: January 2, 2013

Here are 7 house pick-me-ups that take about as much time as brewing a pot of coffee and fit your schedule whenever you have a few extra minutes.

1. Switch the plates. Upgrade your drab, plastic switch plates with snazzy covers that match or accent your décor. Even the most expensive brass switch plates cost less than $20 each.

Or, spend a buck for a plastic plate and decorate it yourself. Use craft paint, or cover the plate with decorative paper.

You also can switch outlet covers, but don’t get too fancy. Outlet covers should blend with the wall.

2. Touch-up boo-boos. A bit of new paint gives any room a fresh face, which is why you should keep extra color-matched paint after you remodel. Touch up banged-up baseboards, door and window trim, and wall marks that won’t wash away. Even spot painting requires care; use a drop cloth to protect other surfaces.

3. Change out drawer and door hardware. Upgrade your kitchen or bathroom by installing new pulls and knobs. Be sure to measure drawer pulls so you won’t have to drill new holes. Check out these cute and economical ($4.95 for 8) zoo dresser drawer knobs on Esty. Home improvement centers have a large selection of inexpensive pulls and knobs.

4. Update your mailbox. Bump up curb appeal by spray-painting your old mailbox. You can freshen the same color, or go wild with bright hues. Don’t forget to scrub off dirt and rust before painting with rust-proof paint ($6-$12 for a 10-oz. can; lots of decorative textures and colors).

5. Play the numbers game. Decorative house numbers and plates give your home a custom and classy look. Some numbers are quick peel-and-stick affairs; others you’ll have to screw in. They’re made of wood, plastic, brass, stainless steel, and other materials; $6 to $30 each.

6. Embellish your throne. A new toilet seat gives you a regal bearing. Plastic and enameled seats ($12-$25) in a rainbow of colors add a dash of panache; a solid wood mahogany or walnut seat ($45-$60) makes an executive statement; cushioned seats ($15-$20) won’t make a lasting impression — and that’s a good thing.

7. Declutter. You’ll be amazed how a 15-minute daily declutter can make a room look like new. First, get rid of stuff from your fridge door: that large, blank canvas will immediately brighten your kitchen. Corral mail and papers in decorative boxes with tops that can close and hide the mess. Organize school supplies in caddies. Every day, tame a new spot.

Find your next home with me! Text LKHOMES to 87778 or visit http://87778.mobi/LKHOMES for your FREE search.

Laura Key, CalBRELic #0198085
www.KeyCaliforniaHomes.com


Read more: http://members.houselogic.com/articles/easy-quick-house-makeovers/preview/#ixzz2zB5rre1C Follow us: @houselogic on Twitter | houselogic on Facebook

Read More