BLOG

Home Improvement Natalie Jones Home Improvement Natalie Jones

Home Improvement Projects That Require The Help Of A Professional


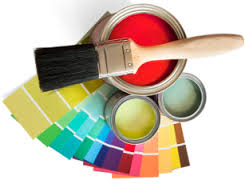
paint-933395_1920.jpg

Photo via Pixabay by Tookapic

Home improvement is a multi-million dollar industry, with thousands of Americans tackling projects both big and small every year. Whether you need to repaint your dining room or replace the roof, your home improvement project will require quite a bit of care and thought to ensure it’s a success. Not only that, you’ll need to think about whether it will be a DIY task or one that necessitates the touch of a pro. This is because some projects are dangerous and require special training to complete. Also, if you attempt to make a repair or major change without the right knowledge or tools, you run the risk of making a mistake that could be very costly to fix. 

Fortunately, there are many service professionals around the country who are ready to help out. Look online for pros near you, and do a little price comparison to make sure you’ll get the best deal. In some cases, your homeowners insurance may help you pay for the repairs--such as a new roof--but you’ll need to talk to an insurance rep to find out exactly what they will cover. 

Here are a few things to think about when it comes to home improvement.

Roofing

There are very few roofing projects that are DIY, mostly because they can be so dangerous and require a lot of special skills. That’s why it’s crucial to make sure you find the right contractor for the job. Do a little research online before making a decision and take the time to read reviews. Roofing scams are, unfortunately, all too common these days, and can take weeks or even months to come to light, as they rely on giving the appearance of having fixed a problem. As soon as bad weather rolls in, the unsuspecting homeowner realizes that the issue was never fixed, and they may be out thousands of dollars to make things right. Once you find a credible roofing company, do some price comparisons to make sure you get the best deal.

Remodeling 

Remodeling jobs are often taken on as DIY projects, but it’s important to make sure you get professional help for the big stuff, like redoing a basement. That’s because this part of the home is more than just a storage space or recreational area; it’s also a crucial part of the structure, and major problems can arise if the walls or flooring become compromised. Also, entrances and exits are often regulated by the city for safety reasons, so you’ll need to do some research on that before getting started. Hire a pro who can come in with knowledge of basement rooms and help you make the most of this space safely.

Electrical work

Anytime electrical work is done in a home, there is a risk of danger or even death, so it’s imperative to call in a pro when you need help with wiring, especially if your home is more than ten years old. When you’re dealing with electricity, you need to make sure the job is done right the first time and that any old issues are taken care of, since there’s a chance not just of electrical shock, but also fire and smoke damage.

Toxin removal

Many older homes have paint or insulation that contains toxins such as lead, mold, and asbestos. These are highly dangerous and can cause everything from allergy-like symptoms to kidney problems to death, so it’s crucial to make sure they are removed from your home by a professional who has the right tools for the job. Other types of mold can be found in damp areas of the home, such as in bathrooms and basements, which can typically be cleaned with a mixture of hot water and bleach. However, if the dampness has caused damage to baseboards, walls, or flooring, a pro should fix those areas.

Home improvement projects can become very costly if they aren’t done right the first time, so keep this in mind when shopping for a contractor or other professional. Spending a bit now may help you save thousands of dollars down the road, and you’ll have peace of mind knowing that your home is in good hands.

Read More
Real Estate Laura Key Real Estate Laura Key

Clever Design Upgrades

Why does one home stand out over others in a market? Sometimes it's the tiny things which sway a buyer's interest. Here are a few clever design upgrades to gain an edge in your neighborhood.

What is it about a home that catches a buyer's eye? Why is it when two homes are comparable to one another, buyers go with the one that just "feels right"? Sometimes the difference is so small, they don't consciously notice. Little touches can give a home a major edge in the market.

In fact, here are five clever design upgrades which can provide your home with that indefinable feeling that it's of higher quality than the competition:

1. Light switch plate upgrades. Homeowners always overlook their own dirty, chipped, or cheap-looking switch plates. If you spend a few bucks to swap out switch plates, any room in the house will seem a tiny bit fresher. Better yet: In the bathroom and kitchen, match the color of your new switch plates to the tile. Look at the accent color in the bathroom or the backsplash in the kitchen for inspiration. 

2. Dimmers on major rooms. Bright lights are great for showing off a home, but there's a little sense of luxury when the overhead lights in living, dining, family, and master bedrooms are on dimmer switches. For fixtures controlled by one switch, get single pole dimmers. For those controlled by two, you'll need 3-way dimmers.

3. Tasteful crown molding. For rooms without crown molding, adding this touch can really make a plain room feel high-quality. Entryways and master bedrooms are good choices if you have a limited budget, but if you want to go all out, include the other bedrooms as well. The key is adding molding which doesn't seem ostentatious or inappropriate given the size and existing decor in the room.

4. Custom home address plaque. For between $50 and $100, you can have an address plaque created with the home's number and the street name spelled out. Look online for inspiration and a design which fits your home. This is a killer upgrade and many homeowners overlook it when they're trying to add curb appeal to their house.

5. New cabinet and drawer hardware. It's astonishing how much modern handles and drawer pulls go towards rejuvenating tired or outdated storage. At a minimum, concentrate on the kitchen, but if you want to go all out, look for options to upgrade the bathroom as well.

You might not be able to quantify the exact return these clever upgrades will net you, but you can bet they will help your home stand out from sellers who won't take the time to make some simple changes.

Are you ready to sell?

Read More

IDEAS FOR ACCENT WALLS

An accent wall can totally transform a room, taking it from boring and drab to bold and exciting. Accent walls create a new focal point for your space, add liveliness and contrast, and are typically a very inexpensive DIY project.

The starter accent wall

You can easily add an accent wall to your room in one afternoon by applying a new paint color. Deep blues and bright oranges are common choices for accent walls, but choose a color that will complement your existing decor and overall design aesthetic.

Interesting textures

Bright, contrasting paint is a good starting point, but there are other options for accent walls that are even more eye-catching and distinct. Floor-to-ceiling wood planks can make your home seem both rustic and modern all at once and provide a natural, outdoors-inspired feel. It’s more work than simply painting a wall, but it’s still relatively inexpensive. You can source the wood from pallets on Craigslist and stain it yourself before attaching it to your wall. It takes a little extra elbow grease, but it’s worth the effort.

Patterns, murals, and more

Paint and wood are bold enough on their own to transform a room, but they’re still pretty subtle compared to other accent wall options. A chalk paint accent wall is a creative idea for any room and makes for some fun moments when you’re entertaining. There are also endless options for wallpaper and stenciling if you want some patterns or you can get really bold with a mural or oversized art print.

Visit my Instagram Page for more tips! https://www.instagram.com/realtygoddess/

Read More
Realty Goddess Laura Key Realty Goddess Laura Key

Unexpected Benefits of Repainting Your Home

paint Unexpected Benefits of Repainting Your Home 

As a homeowner, you understand the importance of updating your property from time to time. Whether you plan on putting your house on the market or are ready to embark on a home improvement project, repainting your home both inside and out is a great way to personalize your living space while also adding value to your home. Read on to discover 5 unexpected benefits that accompany a fresh paint job! 

Cleanliness

The first benefit that comes along with a newly painted interior is a dramatically cleaner house. Over time, interior walls get scuffed, scraped and smudged and often times we don’t even notice. Highly trafficked walkways receive the majority of this damage, but doorways and walls near furniture often find themselves in danger as well. Recently painted walls also take some of the age out of the appearance of your home, and anyone who visits will take notice of how new your home feels. 

Cost Effectiveness

When considering potential home improvement projects, there are few options that provide as much benefit as a new paint job in the same price range. Other common ventures such as remodeling a kitchen or bathroom can cost thousands of dollars between the work, materials, and appliances necessary to complete them. Renewing interior wall paint can be done by the homeowner with the only cost being painting materials, and hiring a local house painter would still be cheaper then other home renovation undertakings.

Air Quality 

Thinking about the cleanliness of the air within your home should be a top priority, and recently painters have become more aware of the effect that their paint has on home environments. This had led to an increase of paints that contain little or no amounts of ‘Volatile Organic Compounds,’ which are carbon-based chemicals that can easily evaporate at room temperature. These compounds, known as VOC’s, are known by the Environmental Protection Agency (EPA) to cause eye, nose and throat irritation, frequent headaches, nausea, and can also damage the liver, kidney and central nervous system. If you live in an older home or you are not sure about the level of these compounds in your current paint, it is imperative that you repaint your interior for your own health.

Environmental Protection 

Having a fresh coat of paint on the exterior of your abode is nearly as beneficial as updating the paint on your interior. The first and most obvious reason that exterior house painting is advantageous is the boost in curb appeal. Whether your house will be listed for sale or not, visitors and passerby will notice the improved aesthetic of your external walls. Beyond just impressing the people who see your home, refreshing the paint on the outside of your house will also protect your building materials. High-quality paint on the exterior of your home will decrease the risks imposed by inclement weather conditions. Repainting the exterior of your home will simultaneously improve the look of your house and save you money by preventing expensive repairs! 

Increased Home Value 

The final, and most obvious, improvement that comes from repainting your home is the bump that your property receives in value. I have already discussed the boost in curb appeal and that fresh paint makes a home feel newer, which are both reasons why your home’s worth will increase. Most realtors advise against starting large renovation projects prior to listing your house for sale out of fear that you will not see a return on your investment, but the low cost associated with a repainted home makes this a safe bet to provide tremendous return on investment. 

Curious to know how much your Southern California home is worth! Get an instant report now! www.CaliOnTheMove.com 

Bio: Matt Lawler is an Internet marketing specialist from Tempe, Arizona where he attended Arizona State University. Whenever he can step away from the computer, Matt enjoys playing sports, traveling and exploring the great outdoors. Follow him on Twitter.

Laura Key, REALTOR®

Cal BRE 01908085

310-866-8422

Laura.A.Key@gmail.com


Read More

How to Replace a Toilet Handle

Image

How to Replace a Toilet Handle

By: Oliver Marks

Published: December 14, 2012

Replacing a toilet handle is one of the easiest — and most-common — DIY projects. Here’s what you need to know.

Is your toilet flush handle broken, rusted, pocked, or just plain and old-fashioned looking? Maybe it’s always loose, no matter how many times you tighten that nut on the inside of the tank?

Replacing it with a new flush handle updates the look of the toilet -- and therefore, the whole bathroom — and takes care of annoying wiggles.

It’s an affordable, easy, do-it-yourself job, says Mt Pleasant, S.C., handyman Tim Shaw, who specializes in low-cost bathroom makeovers.

1) Open the tank. Remove the tank lid and set it on a spread-out towel in an out-of-the-way spot (be careful — porcelain is brittle). Look for a model name or number printed inside the tank (as well as the brand name on the outside), and write that information down. It may come in handy when you buy a replacement handle.

2) Unhook the lift chain. You’ll see that the handle is attached to a long arm inside the tank, and that the arm is linked to a chain that lifts the flush valve. Note which hole the chain is hooked to (there are usually three or more holes on the arm) and then unhook the clasp that holds the chain to the arm.

3) Remove the old handle. Use a crescent wrench to remove the nut inside the tank that holds the handle in place. Be careful: For the vast majority of toilets, the nut has left-handed threads, which means they turn in the reverse direction of a normal nut. If you were to face the nut directly, you’d turn it clockwise to loosen it.

Don’t force it, because if you turn it hard the wrong way (or the wrench slips and slams into the tank wall), you could crack the porcelain. If the nut is rusted in place, give it a shot of lubricant, such as WD-40, and try again. Once you loosen the nut, remove it by hand, and slide the arm through the hole.

4) Purchase a replacement. The replacement part you need is called a “toilet trip lever” and it includes the handle and swing arm. They retail for under $20, but models for high-end toilets may cost $50 to $100. Though some trip levers are labeled as universal replacements, there really is no such thing. There are differences between the length and angles of the arms, the placement on the tank (left or right, front or side), and the style and finish of the handle.

Go to a plumbing supply or home center that sells your toilet brand, and ask your retailer for help choosing the right fit. Show them the model number and brand name of your toilet.

“Bring the old handle to the store with you to help select a matching new one,” advises Shaw. “That way you can compare the old piece to the new products being sold.”

5) Attach the new handle. Use a soapy scrub sponge to clean any mildew or rust stains off the porcelain around the handle hole. Remove the nut from the new handle, and insert the arm into the hole. Slide the nut back over the arm and hand-turn it onto the handle base — again, remembering that it’s likely a left-handed thread.

Use a crescent wrench to firm it up, but don’t over-tighten or you could crack the porcelain.

6) Attach the chain. Clip it to the same hole as on the old arm. Then do some test flushes. You want the flush mechanism to open and close fully. If the chain is too loose, the tank won’t drain fully. If too tight, the chain may prevent the flush valve from seating properly, causing it to leak continually.

Adjust by switching which hole the chain is clipped to, or by adjusting the chain up or down a link or two. Keep testing until the flush works just right. Once you’re satisfied, replace the tank lid and you’re done.

Find your next home with me! Text LKHOMES to 87778 or
visit http://87778.mobi/LKHOMES for your FREE search.
 
Laura Key, CalBRELic #0198085
www.KeyCaliforniaHomes.com

Read more: http://members.houselogic.com/articles/how-to-replace-toilet-handle/preview/#ixzz2zB9NcecV

Follow us: @houselogic on Twitter | houselogic on Facebook

Read More

15-Minute Home Makeovers

Home_Makeover

15-Minute Home Makeovers

By: Lisa Kaplan Gordon

Published: January 2, 2013

Here are 7 house pick-me-ups that take about as much time as brewing a pot of coffee and fit your schedule whenever you have a few extra minutes.

1. Switch the plates. Upgrade your drab, plastic switch plates with snazzy covers that match or accent your décor. Even the most expensive brass switch plates cost less than $20 each.

Or, spend a buck for a plastic plate and decorate it yourself. Use craft paint, or cover the plate with decorative paper.

You also can switch outlet covers, but don’t get too fancy. Outlet covers should blend with the wall.

2. Touch-up boo-boos. A bit of new paint gives any room a fresh face, which is why you should keep extra color-matched paint after you remodel. Touch up banged-up baseboards, door and window trim, and wall marks that won’t wash away. Even spot painting requires care; use a drop cloth to protect other surfaces.

3. Change out drawer and door hardware. Upgrade your kitchen or bathroom by installing new pulls and knobs. Be sure to measure drawer pulls so you won’t have to drill new holes. Check out these cute and economical ($4.95 for 8) zoo dresser drawer knobs on Esty. Home improvement centers have a large selection of inexpensive pulls and knobs.

4. Update your mailbox. Bump up curb appeal by spray-painting your old mailbox. You can freshen the same color, or go wild with bright hues. Don’t forget to scrub off dirt and rust before painting with rust-proof paint ($6-$12 for a 10-oz. can; lots of decorative textures and colors).

5. Play the numbers game. Decorative house numbers and plates give your home a custom and classy look. Some numbers are quick peel-and-stick affairs; others you’ll have to screw in. They’re made of wood, plastic, brass, stainless steel, and other materials; $6 to $30 each.

6. Embellish your throne. A new toilet seat gives you a regal bearing. Plastic and enameled seats ($12-$25) in a rainbow of colors add a dash of panache; a solid wood mahogany or walnut seat ($45-$60) makes an executive statement; cushioned seats ($15-$20) won’t make a lasting impression — and that’s a good thing.

7. Declutter. You’ll be amazed how a 15-minute daily declutter can make a room look like new. First, get rid of stuff from your fridge door: that large, blank canvas will immediately brighten your kitchen. Corral mail and papers in decorative boxes with tops that can close and hide the mess. Organize school supplies in caddies. Every day, tame a new spot.

Find your next home with me! Text LKHOMES to 87778 or visit http://87778.mobi/LKHOMES for your FREE search.

Laura Key, CalBRELic #0198085

www.KeyCaliforniaHomes.com


Read more: http://members.houselogic.com/articles/easy-quick-house-makeovers/preview/#ixzz2zB5rre1C Follow us: @houselogic on Twitter | houselogic on Facebook

Read More
Realty Goddess Laura Key Realty Goddess Laura Key

What Home Projects Should You Do Yourself?

 DIY

What Home Projects Should You Do Yourself?

By: Oliver Marks

Published: March 8, 2011

Doing maintenance jobs yourself can be a smart way to save money, but choose the right DIY projects or you'll end up paying dearly.

Why pay someone to do something you can do yourself? Because sometimes doing it yourself costs more than it saves.

More than 100,000 people injure themselves each year doing home improvement jobs. So add medical bills to your DIY budget, and you ending up spending the same, or more, than if you hired a pro.

We’re not suggesting that you call a plumber each time you need to plunge a toilet. But think twice about what DIY might really cost you. Here’s how to decide.

Stick to routine maintenance for savings and safety

Seasonal home maintenance is ideal work for the weekend warrior because you can tackle these jobs when your schedule permits. Because these are routine maintenance projects, your savings will add up. Mowing your own lawn, for example, saves $55 to $65 a week for a half-acre lawn. The bigger the lot, the bigger the savings: with two acres, you’ll pocket around $150 per week.

When it pays:

  • Snow removal
  • Pruning shrubs
  • Washing windows (be careful on that ladder)
  • Sealing decks
  • Painting fences
  • Fertilizing lawns
  • Replacing air conditioner filters
  • Cleaning gutters

When it costs: Unless you have skill and experience on your side, stay off any ladder taller than six feet; according to the U.S. Consumer Product Safety Commission, emergency rooms are filled with people with ladder injuries. The same goes for operating power saws or attempting any major electrical work—it’s simply too risky if you don’t have the experience.

Become your own general contractor

If you’re more comfortable operating an iPhone than a circular saw, you could act as your own general contractor on some home improvement projects. That means you hire, schedule, and pay the carpenters, plumbers, and other tradesmen yourself. You’ll save 10% to 20% of the job cost, which is the contractor’s typical fee.

When it pays: If it’s a small job that requires only two or three subcontractors, and you have good relationships with top-quality professionals in those fields, consider DIY contracting.

When it costs: When you don’t have an established network of reliable workers, time to supervise, construction experience to spot problems, and the skill to negotiate disputes between subcontractors, your project and budget are at risk.

Invest sweat equity on big jobs

Contribute your own labor to big jobs being handled by a professional crew and cut hundreds, even thousands, off construction costs. For instance, tear out kitchen cabinets and appliances before the contractor gets started, and you might knock $800 off the cost of your remodel. Make sure you negotiate cost savings with your contractor before pitching in.

When it pays: Jobs that are labor-intensive but require relatively little skill make perfect sweat equity jobs. Perform minor interior demolition, such as pulling up old flooring, daily job site cleanup, product assembly, and simple landscaping.

When it costs: If you get in the crew’s way, you may slow them down far more than you help. Make your contributions when the workers aren’t around; mornings before they arrive, or nights and weekends after they’ve left.

Add finishing touches

Unlike the early phases of a construction job--which require skilled labor to frame walls, install plumbing pipes, and run wires--many finishing touches are comparatively simple and DIY-friendly. If you paint a basement remodel yourself, for instance, you can save up to $1,800.

When it pays: If you have skill, patience, or an experienced friend to teach you, setting tile, laying flooring, painting walls, and installing trim are good DIY jobs.

When it costs: The downside to attempting your own finish work is that the results are very visible. Hammer dents in woodwork, or sander ruts in hardwood floors will annoy you every time you see them. So unless you have a sure eye and a steady hand, don’t perform the tasks that only a skilled tradesperson will get right.

Find your next home with me! Text LKHOMES to 87778 or visit http://87778.mobi/LKHOMES for your FREE search.
Laura Key, CalBRELic #0198085
www.KeyCaliforniaHomes.com

Read more: http://members.houselogic.com/articles/when-it-pays-to-do-it-yourself/preview/#ixzz2zB35ZiLI Follow us: @houselogic on Twitter | houselogic on Facebook

Read More

Do It Yourself Simple Repairs

You can save money with these simple fixes!

DIY

Treatment for a scratched wood floor.  For minor scratches, crayons will do the trick. Pick a color that matches the flooring, and color in the scratched area. Be sure to stay in the lines; then buff to a shine. A matching permanent marker can camouflage deeper, ugly scratches. Another method: Grind the meat of a walnut or pecan into the scratch. The nut oil will provide a shine that blends with a polyurethane or water-based surface finish.

Pennywise way to unclog a drain.  For a balky drain, try dropping three Alka-Seltzer tablets down the sink followed by a cup of white vinegar. After about 15 minutes, you can clear the drain with boiling water. Do not attempt this trick immediately after using a commercial drain opener like Drano or Liquid-Plumr.

You’ve stripped a screw. Now what do you do? Using a hacksaw, cut into the top of the screw to create a new groove for the screwdriver.

Clean up your walls . . . with toothpaste. Patch small holes using a putty knife or butter knife to smooth non-gel toothpaste into the hole. Sand the spot to smooth the surface. To erase crayon marks from walls, grab toothpaste (again, non-gel) and a scrub brush; then, just wipe until the marks are gone.

Curious to know how much your home is worth? Call me for a FREE Comparative Market Analysis!  Laura Key 310.866.8422

Read More
Real Estate, Realty Goddess Laura Key Real Estate, Realty Goddess Laura Key

Home Improvement with Heart — Just in Time for Valentine’s Day

Roses are red; violets are blue — here are romantic improvements that add value, too. The sensual shower

What makes your honey feel better than a long, soothing shower? (OK. It’s a rhetorical question.) But showering exactly the way you want it is a little luxury that can set the mood for a lot of love.

Programmable showers ($290 to $3,500) let you digitally determine water temperature, pressure, even type of spray. Pulsating, anyone? 

And if you want things to get a little steamy in the bedroom, start in the bathroom with asteam shower ($7,000 to $10,000). You’ll need space to put the steam generator — an adjacent closet will do — and you’ll have to make your shower airtight to trap the steam. Or you can buy a prefab unit ($1,000 to $5,000) that you can install yourself or hire a pro to do the wet work ($500 to $1,000).

Read on to learn about more romantic home improvements:

  • Squeaky Clean
  • Dim the Lights
  • Surround Yourself with Sound
  • Fireplaces Turn Up the Heat

Squeaky clean

We know you’ll want to be extra clean and coiffed for Valentine’s Day night, so get ready for the fun with an electronic toilet seat that washes and warms, plays music, and sprays pleasant scents.

A couple of years ago, these deluxe seats were hard to come by. Now, big box stores around the country sell these bathroom accessories that fit on top of your toilet ($150 to $600). They come with a host of features, some with slow-closing lids and germ-resistant seats. 

If you want to go whole hog, buy complete high-tech toilets that also include LED lights for late night bathroom breaks and no-touch flush ($450 to $1,100).

Dim the lights

Help romance along by avoiding harsh overhead lights and instead installing dimmers on bedroom lights ($16 to $38) or just replacing a few lamps with lower wattage bulbs.

Not only will dim lighting set the mood, but lowering brightness extends the life of bulbs,saving energy and money — and what’s sexier than that?

Surround yourself with sound

Isn’t it romantic to listen to music in the dining room, bedroom, even the bath? 

You can go high-end — and high-effort — and have a sound specialist install whole-house sound, which entails running speaker wires through ceilings and walls ($700 to $2,700 per room), and hooking up a pair of speakers ($100 to $2,000 each pair).

Or, you can save some money and install a wireless system yourself. The music is distributed by a computer and sent via router into small player boxes in each room ($400 per room). This DYI project takes a couple of hours.

Fireplaces turn up the heat

Lounging by the fireplace on Valentine’s Day, sipping champagne, eating chocolate-covered strawberries is a dream celebration. But, let’s get down to earth and just settle for the fire.  

If you already have a wood-burning fireplace, sweep it out and perform chimney maintenance so your V-Day doesn’t go up in flames. 

If you’re missing a place for flames, you could go all out and add a fireplace. If you have a wood-burning fireplace one but never use it because of the hassle, you can retrofit with agas fireplace insert that gives you light and heat with just a flick of a switch ($3,000 to $4,000).

Or, if you’re in a hurry, install a plug-in, electric fireplace that supplies a realistic-looking flame and even heat. Installation is a DIY project. Your biggest hassle will be selecting the location — along a wall or stand-alone — and picking the most romantic-looking mantle surround or fireplace shelf (with mantle package $800 to $1,600).

Tell us what you love about your home.

Love My House

Thinking of buying or selling your home! You need someone who is experienced, caring and hardworking!  Call Laura Key today at 310.866.8422 or email Laura.A.Key@gmail.com

Read More